RV And Van Life CPAP Power: Shore, Solar, Alternator, Or Battery?
Plan CPAP power in an RV or van with 12V DC adapters, pure sine inverters, house batteries, solar sizing, alternator charging, and boondocking margin.
By Max · Published August 30, 2026
This is backup-power planning information, not medical advice. Follow your device manufacturer's instructions and ask your care team about treatment decisions.
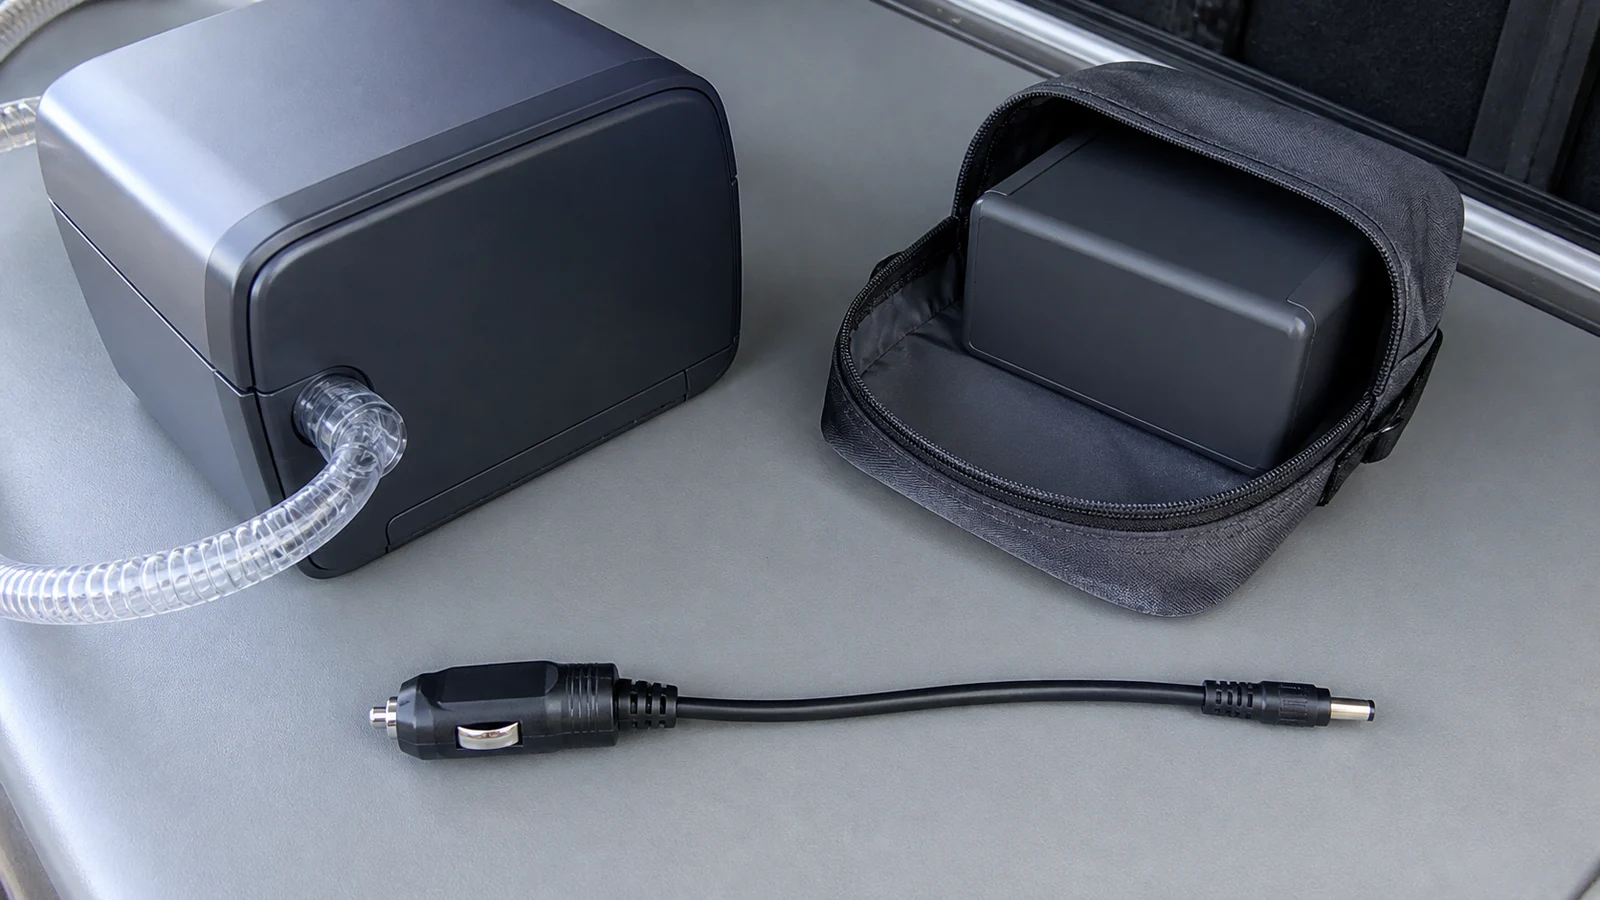
When your machine manufacturer supports a battery connection, an RV’s 12V house system and the correct model-specific DC converter are the first path to investigate. For example, ResMed’s AirSense 11 DC/DC converter guide identifies converter 390002 for AirSense 11 and a 12V or 24V vehicle auxiliary outlet; it also warns about preserving starting-battery reserve, disconnecting when unused, and not modifying or substituting USB connections. Those are AirSense 11/converter-specific boundaries, not proof that any CPAP can use an RV socket. Shore power and a normal power brick remain the simple choice at a powered site.
That keeps the power path short. Using an inverter adds a second conversion from battery DC to 120V AC before the CPAP power supply converts it back to DC. ResMed’s battery guide strongly recommends its specified DC-to-DC converter for covered machines and gives separate battery-sizing tables for inverter use. It does not publish one universal efficiency percentage for every RV setup. Verify the RV outlet’s voltage, fuse/current rating, and live-state in the vehicle manual before connecting anything.
Fast Setup Choices
| Situation | Best starting setup | Why |
|---|---|---|
| Campground shore power | Normal CPAP power brick | Simple, unlimited while plugged in |
| Boondocking one CPAP, humidifier off | RV 12V outlet plus correct DC adapter | Uses the manufacturer-preferred power path when supported |
| Unknown RV inverter quality | Portable power station or DC adapter | Avoid modified sine wave risk |
| Humidifier on overnight | Larger house bank or power station | Heat dominates watt-hours |
| Van life with daily driving | Supported DC path plus measured vehicle recharge | Less dependent on sun, but input rate still matters |
| Several cloudy days | House battery plus generator or driving fallback | Solar alone may not keep up |
Know Your RV Power System
RV Park Or Boondocking: Which Plan Applies?
Choose the power plan from the site you will actually use. At an RV park with a confirmed hookup, the normal CPAP power brick can be the primary path and a small tested battery can cover a pedestal or breaker interruption. When there is no hookup, the house-bank DC path and its solar, alternator, or other recharge plan become the primary design.
| Site condition | Starting plan | What to verify |
|---|---|---|
| Hookup available | Normal power brick plus tested backup battery | Pedestal, breaker, outlet location, and backup charge |
| No hookup for one night | House-bank DC path or tested power station | Exact adapter, house-battery state, and overnight reserve |
| No hookup for multiple nights | House bank plus solar or alternator recharge | Recovery rate, cloudy-day margin, other RV loads, and fallback |
| Trip changes from park to dry camp | Carry both documented paths | Battery charge, DC cable, and the recharge plan at departure |
The park plan does not eliminate testing. A campground pedestal or breaker can fail, and an outlet that worked on shore power may not remain available after a site change. Verify the normal outlet during the day and keep the backup charged before bedtime.
The boondocking plan needs more than a battery with enough nameplate watt-hours for one night. Use the measured CPAP load, humidifier and heated-hose state, other RV loads, usable battery energy, reserve, and the next day’s recharge opportunity. The RV test-night procedure shows how to check the complete path.
If your itinerary moves between powered and unpowered sites, do not let the first campground hide a weak dry-camping plan. Keep the normal power brick, approved DC adapter, and charged backup together. The full-time van electrical buildout covers the larger starter-to-house-bank flow, while this section answers which version applies at tonight’s site.
Most RVs have two electrical systems:
| System | What it powers | CPAP relevance |
|---|---|---|
| 12V DC house system | lights, fans, pump, controls, USB ports | Candidate path when the machine and adapter support it |
| 120V AC system | household outlets, microwave, air conditioner | Works on shore power or inverter |
The converter charges the house battery from shore power. The inverter, if installed, creates 120V AC from the house battery. Not every RV has an inverter, so verify the installed equipment and its manual.
For a ResMed setup covered by the guide, follow its inverter instructions rather than assuming any built-in RV outlet is suitable. The guide generally calls for a certified pure sine wave inverter and lists narrow exceptions for certain older devices.
Do not assume every outlet in the RV behaves the same way. Some outlets work only on shore power. Some work from the inverter. Some 12V sockets stay live all night, while others shut off with a control panel or ignition state. Before a trip, unplug from shore power and test the exact outlet you plan to use for a full evening.
Also learn which battery the outlet draws from. A house battery is meant to support overnight loads. A starter battery is meant to start the engine. Running CPAP from the wrong battery can turn a sleep problem into a vehicle problem the next morning.
Full-Time Van Electrical Buildout
A full-time van electrical system gives the CPAP a place in a larger power flow. The CPAP is one named load alongside refrigeration, lighting, ventilation, communications, and other equipment. The design needs to preserve the starter battery while charging a separate house bank and feeding the loads through their approved paths.
The high-level flow looks like this:
Starter battery and alternator
              ↓
       DC-DC charger
              ↓
      House LiFePO4 bank  ←  solar panels and charge controller
              ↓
  CPAP through correct DC adapter
              ↓
  Inverter only for supported AC loads
The Explorist.Life solar wiring diagrams and FarOutRide electrical-system guide are non-primary background references, not authority or permission to copy a diagram. Check the battery chemistry, charger profile, cable run, overcurrent protection, and installed components with the vehicle and equipment manuals.
| Component | Role in the CPAP plan |
|---|---|
| Starter battery and alternator | Supplies vehicle charging while preserving engine-start capacity |
| DC-DC charger | Separates the vehicle and house systems and charges the house chemistry with its configured profile |
| House LiFePO4 bank | Stores energy for CPAP and the van’s other loads |
| Solar panels and controller | Add a daytime recharge source when sun, placement, and controller limits allow |
| Correct CPAP DC adapter | Connects the machine to the house-bank voltage when the manufacturer supports that path |
| Inverter | Supplies supported AC loads when a direct DC path is unavailable or inappropriate |
Size the house bank from the measured overnight CPAP energy plus the other loads and required reserve. The solar charging guide and the existing alternator section above cover the recharge calculations. Do not size the CPAP portion from a battery label alone, and do not assume a 12V socket or house-bank voltage proves that the machine can connect directly.
The CPAP DC path is often the runtime advantage because it avoids converting house-bank DC to AC and then back to machine DC. That advantage exists only when the exact machine and adapter support the connection. AC-only machines still need the documented inverter and normal power supply path.
The install boundary matters. This section gives the power flow and the questions to bring to a qualified van electrician. It does not provide step-by-step wiring instructions. Have a qualified RV electrician or other appropriately qualified installer determine fusing, cable sizing, charger profile, disconnects, and alternator integration for a permanent system. Ask the installer to identify the expected charging sources, the CPAP adapter output, and the fallback if the house bank is low. Keep the CPAP as a separately labeled load in the final documentation.
The DC Adapter Is The Main Runtime Win
Use your exact CPAP model to choose the adapter. The DC adapter finder maps common machines to their documented DC cable path as a starting point; the manufacturer documents below stay the final word.
| Machine documentation | What to verify |
|---|---|
| Machine user guide | Whether battery/DC operation is supported |
| Manufacturer battery guide | Named converter, cable, and battery assumptions |
| Converter label/manual | Input range, output, connector, and temperature limits |
| RV outlet documentation | Voltage, current rating, fuse, and whether it stays live overnight |
Do not guess by connector shape. Match the exact machine model and converter part number in current manufacturer documentation.
The adapter should be treated as part of the medical-power kit, not as a random RV cable. Label it with the machine model, store it with the CPAP, and test it from the same 12V outlet or power station port you will use on the road. If the adapter has a converter brick, keep that brick ventilated and off bedding.
Even when a machine and an RV outlet use different nominal voltages, the correct manufacturer-supported converter may provide the required path. The cable still has to match the machine and output rating. Travel machines can also use proprietary connectors, so check the exact model.
If the CPAP restarts, the battery port shuts down, or the cable gets hot, the test failed. Do not solve that by trying a different tip that happens to fit. Go back to the machine voltage, current rating, outlet rating, and adapter documentation.
Size Solar From A Measured Night
Solar sizing starts with the complete measured overnight load, including humidification. For the CPAP share of that load across several boondocking nights, the multi-night planner shows how far a given battery stretches before it needs a recharge window.
| Input | What to record |
|---|---|
| CPAP overnight use | Energy removed from the battery during a full test night |
| Other RV loads | Fridge, lights, fans, pumps, laptops, and standby loads |
| Recharge window | Real solar, driving, shore, or generator hours available the next day |
| Reserve | Nights you need to cover when charging underperforms |
For boondocking, size from the cloudy or shaded day, not the panel’s label. Weather, shade, panel angle, season, charging limits, and other RV loads all change how much energy reaches the battery.
Solar also depends on when you are parked. A van that drives during the day and reaches camp late may not have enough panel time to recover the CPAP battery. A shaded campsite can cut production even when the weather is clear. Winter sun gives fewer useful charging hours, and tilting a portable panel may matter more than the sticker wattage.
For CPAP-only solar, start with the nightly watt-hours and then ask how many bad charging days you need to survive. A single clear day is not the design case for a medical-adjacent sleep load.
Example worksheet:
Measured CPAP energy per night:
Other overnight loads:
Usable battery energy at the planned reserve level:
Nights without dependable charging:
Measured energy recovered during a typical solar or driving day:
Fallback when recovery is short:
If heated humidity materially changes the test result, the solar and battery design changes with it. That is why the humidifier and hose state belong at the top of the RV plan.
Alternator Charging Is The Reliability Layer
Solar is quiet. Alternator charging is dependable.
If you drive regularly, vehicle charging can be part of the recovery plan, but only a measured test can show whether the input replaces the previous night’s energy during your normal drive.
For CPAP alone, a simple 12V socket charge may be enough. For a fridge, laptops, induction cooking, and CPAP, use a real van electrical design.
A portable power station charged from a vehicle socket may recharge slowly. That can still be useful if you drive every day, but it may not replace a large overnight CPAP load quickly. Check the input wattage, not only the battery capacity.
For a permanently installed house bank, use a charging design approved for the battery chemistry, vehicle, cable run, overcurrent protection, and expected current. That is an RV electrical-design decision, not a CPAP cable shortcut; use a qualified installer rather than treating this article as wiring guidance.
Do not idle a vehicle or run a fuel-burning generator in, beside, or near an enclosed or partly enclosed sleeping vehicle. The CDC says carbon monoxide is odorless and colorless and advises keeping portable generators outdoors more than 20 feet from windows, doors, and vents. Follow the vehicle and generator instructions, and keep combustion-based recharge separate from the sleeping space.
Humidifier Decision
Humidification and heated tubing can materially change the measured overnight load.
| Humidifier state | RV impact |
|---|---|
| Off | Measure this as the lower-heating baseline |
| Low | Measure the actual overnight energy use |
| High | Measure again because the result may differ substantially |
| Heated hose in cold RV | Include its draw in the overnight test |
Do not change prescribed therapy settings to save power. But if heated humidification is optional for your comfort, test lower settings before the trip and bring a passive moisture option if your mask/machine supports it.
Write two plans: campground comfort and boondocking reserve. Campground comfort can use the normal humidifier and heated hose because shore power is available. Boondocking reserve should name the lowest comfortable heat setting, whether a heated hose is used, and what happens if the battery state is low before bedtime.
That written distinction prevents a common mistake. The CPAP user tests at home with heat off, then on the trip turns the humidifier back on because the night is dry. The battery estimate no longer matches the setup.
Rainout And Compliance Data
RVs and vans can swing from warm evenings to cold mornings. That makes rainout more likely when humidified air meets a cold hose.
Start with simple fixes. Keep the machine lower than your head when possible, insulate the hose, and route tubing through a warmer path when it is safe and comfortable. If humidifier settings are optional for your comfort, test lower settings before the trip. Use heated tubing only as much as needed because it adds power draw.
Compliance data can also matter if your insurer or clinician monitors usage. Make sure your machine has cellular signal, Wi-Fi access, or an SD card plan while traveling.
Recommended Setups
| Trip type | Setup |
|---|---|
| Weekend campground | Normal power brick on shore power, DC adapter as backup |
| Weekend boondocking | Tested house battery or power station, correct cable, documented humidity state |
| Continuous van life | DC adapter, lithium house bank, DC-DC alternator charger, solar |
| Winter boondocking | Larger battery, cold derating, heated hose strategy, recharge fallback |
| Two CPAP users | Measure both complete setups, add their energy use, then add reserve |
A Simple RV Test Night
Run a test night in the driveway before the trip:
- Charge the RV house battery or power station.
- Unplug from shore power.
- Connect CPAP through the planned DC adapter or AC path.
- Use the same humidifier and hose settings planned for travel.
- Record start and end battery state.
- Check whether other RV loads ran overnight.
- Recharge the next day using the planned solar, alternator, generator, or shore path.
The recharge step is important. A setup that runs one night but takes two days to recover is not a multi-night boondocking plan.
What To Keep Out Of The CPAP Power Budget
Do not quietly add phones, laptops, camera batteries, Starlink, fridge loads, fans, or induction cooking into the same battery estimate without recalculating. CPAP may be a modest load by itself. It becomes one load among many in an RV electrical system.
If the CPAP battery is separate from the house bank, mark it CPAP-only until the sleep plan is safe. Using it to recharge phones during the day can spend the reserve needed that night.
Two-CPAP Households
Two CPAP users do not need a separate formula, but they do need separate inputs. Add both machines, both humidifier states, both hose states, and both connection paths before sizing the house battery. If one person uses heated humidity and the other does not, the loads will not be equal.
For couples, a shared power station can be better than two small travel batteries because it may have enough capacity and easier recharge. The tradeoff is a single point of failure. Keep both CPAP power bricks, both DC adapters if used, and a written setup note in the same location.
When Shore Power Is Still The Best Answer
If the trip is mostly campgrounds with reliable shore power, do not overbuild a solar system only for CPAP. Bring the normal power brick, request or choose a site with power, and keep a small backup battery or DC plan for outages. The heavy electrical build becomes more important when you boondock, travel continuously, or need power for several devices.
The CPAP plan should fit the travel style. A weekend at a powered campground, a winter boondocking trip, and full-time van life are not the same problem.
Hunting Camp And Remote Cabin Planning
A hunting camp or remote cabin is an off-grid power problem with a quieter sleeping-space requirement. Start with the same DC-first setup and house-bank options described above, then plan for no shore power, seasonal storage, and a recovery method when the weather or fuel plan changes. A portable station paired with solar can avoid engine noise at the sleeping area, but solar is a recharge layer rather than a runtime guarantee. Use the solar charging guide to compare the measured nightly load with the site’s usable charging window.
For a multi-night camp, the practical split is often battery overnight and generator recharge while people are awake. The generator comparison guide covers the generator decision and carbon-monoxide boundary. Never run a fuel-burning generator in a cabin, tent, vehicle, or other enclosed or partly enclosed space. The CDC says carbon monoxide is odorless and colorless, so keep the generator outside and follow its instructions for placement and ventilation.
Before leaving, check the cabin plan as a short scenario list:
- Confirm there is no dependable shore-power assumption hiding in the plan.
- Test the CPAP, exact adapter, and overnight settings from the battery or house bank.
- Name the quiet overnight source and the daytime recharge source.
- Store the battery according to its instructions between seasonal trips. The battery maintenance guide covers storage and readiness checks.
- Keep a fallback for a cloudy day, a fuel problem, or a battery that does not recover as expected.
If the camp has only a generator and no practical battery or solar layer, use the generator guide’s decision instead of treating this as a separate CPAP setup. The cabin scenario adds planning context, not a new runtime formula.
Bottom Line
For RV and van life, investigate the manufacturer-supported DC path first and measure the complete setup overnight. The outage-planning guide can help you turn that test into a fallback plan.
Boondocking does not need a separate CPAP formula. It needs the same DC-first setup, plus more reserve for cloudy solar days, cold nights, and humidifier use.
Sources
- ResMed Battery Guide (manufacturer; retrieved 2026-09-01)
- ResMed AirSense 11 DC/DC Converter User Guide (manufacturer; retrieved 2026-09-01)
- CDC Carbon Monoxide Safety (regulator; retrieved 2026-09-01)